IEx in a Box
TLDR#
Here’s the code you probably want. Modify it as you see fit.
# filename: lib/my_firmware/endpoint.ex
defmodule MyFirmware.Endpoint do
  use Plug.Router
  plug(Plug.Static, from: :my_firmware, at: "/public")

  plug(:match)
  plug(:dispatch)

  get "/console" do
    html = """
    <!DOCTYPE html PUBLIC"-//W3C//DTD XHTML 1.0 Strict//EN" "http://www.w3.org/TR/xhtml1/DTD/xhtml1-strict.dtd">
    <html xmlns="http://www.w3.org/1999/xhtml">
      <head>
        <meta content="text/html;charset=utf-8" http-equiv="Content-Type">
        <meta content="utf-8" http-equiv="encoding">
        <link rel="stylesheet" href="/public/app.css">
      </head>
      <body>
        <div id="terminal"></div>
        <script src="/public/app.js"></script>
      </body>
    </html>
    """
    send_resp(conn, 200, html)
  end

  match _ do
    send_resp(conn, 404, "not found")
  end
end
# filename: lib/my_firmware/console_socket.ex
defmodule MyFirmware.ConsoleSocket do
  @moduledoc """
  Simple Websocket handler that starts an embedded iex console
  """

  # Tells the compiler we implement the `cowboy_websocket`
  # behaviour. This will give warnings if our
  # return types are notably incorrect or if we forget to implement a function.
  # FUN FACT: when you `use MyAppWeb, :channel` in your normal Phoenix channel
  #           implementations, this is done under the hood for you.
  @behaviour :cowboy_websocket

  # entry point of the websocket socket.
  # WARNING: this is where you would need to do any authentication
  #          and authorization. Since this handler is invoked BEFORE
  #          our Phoenix router, it will NOT follow your pipelines defined there.
  #
  # WARNING: this function is NOT called in the same process context as the rest of the functions
  #          defined in this module. This is notably dissimilar to other gen_* behaviours.
  @impl :cowboy_websocket
  def init(req, opts), do: {:cowboy_websocket, req, opts}

  # as long as `init/2` returned `{:cowboy_websocket, req, opts}`
  # this function will be called. You can begin sending packets at this point.
  # We'll look at how to do that in the `websocket_handle` function however.
  # This function is where you might want to  implement `Phoenix.Presence`, schedule an `after_join` message etc.
  @impl :cowboy_websocket
  def websocket_init(_) do
    {:ok, tty} = ExTTY.start_link([handler: self()])
    {[], %{tty: tty}}
  end

  # `websocket_handle` is where data from a client will be received.
  # a `frame` will be delivered in one of a few shapes depending on what the client sent:
  #
  #     :ping
  #     :pong
  #     {:text, data}
  #     {:binary, data}
  #
  # Similarly, the return value of this function is similar:
  #
  #     {[reply_frame1, reply_frame2, ....], state}
  #
  # where `reply_frame` is the same format as what is delivered.
  @impl :cowboy_websocket
  def websocket_handle(frame, state)

  # :ping is not handled for us like in Phoenix Channels.
  # We must explicitly send :pong messages back.
  def websocket_handle(:ping, state), do: {[:pong], state}

  # a message was delivered from a client. Here we handle it by just echoing it back
  # to the client.
  def websocket_handle({:text, message}, state) do
    ExTTY.send_text(state.tty, message)
    {[], state}
  end

  # This function is where we will process all *other* messages that get delivered to the
  # process mailbox. This function isn't used in this handler.
  @impl :cowboy_websocket
  def websocket_info(info, state)

  def websocket_info({:tty_data, data}, state) do
    {[{:text, data}], state}
  end
end
// filename: priv/static/app.js
import "xterm/css/xterm.css";
import { Terminal } from 'xterm';
window.onload = function() {
  var host = window.location.hostname;
  var port = window.location.port;
  var term = new Terminal();
  term.open(document.getElementById( "terminal" ));

  // Create WebSocket connection.
  const socket = new WebSocket('ws://' + host + ':' + port + '/socket');

  // Connection opened
  socket.addEventListener('open', function (event) {
    term.onData((val) => {
      socket.send(val);
    });
  });

  // Listen for messages
  socket.addEventListener('message', function (event) {
    term.write(event.data);
  });
}
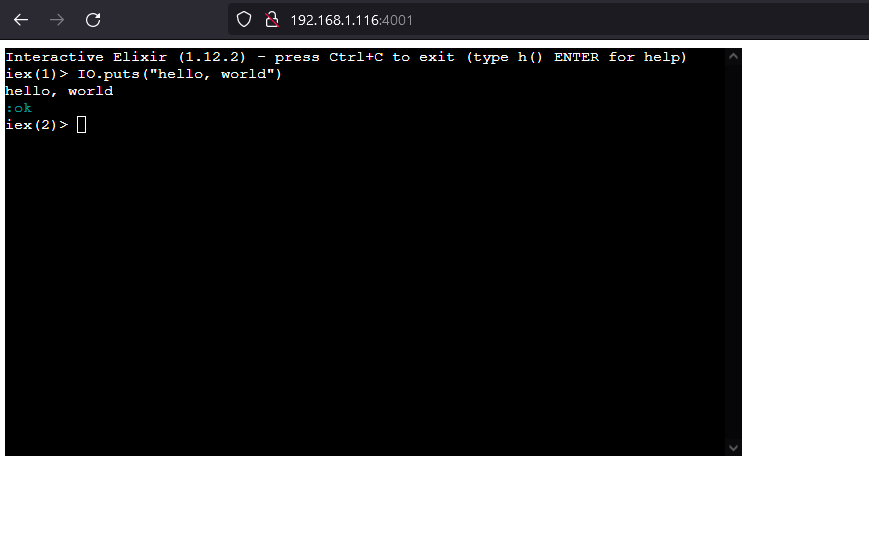
Embedded IEx console#
In Elixir, one of the handiest things at your disposal as a developer and system maintainer is the IEx console. There are a million ways to get access to it. You’re likely already famaliar with the classic
iex -S mix
You can of course also use Erlang distribution:
iex -name console@localhost -cookie democookie --remsh app@localhost
But did you know it can also be accessed in other ways? For example, you could make the console accessable via SSH. We already do this for you with Nerves, you can check that out here.
In this post, I’ll describe how to embed your own console. This can be tunneled however you want, but the example provided will be tunneled over a standard http server.
The Building Blocks#
As is customary around these parts, we aren’t going to write much code. Just glue it together.
First up, we’ll need a handful of dependencies. Add these to mix.exs
{:plug_cowboy, "~> 2.0"},
{:extty, "~> 0.2"},
I’m sure you’ve heard of Plug and Cowboy before, but extty may be new to you. In short,
it’s what allows creating a shell so easily. It implements a simple process-based API for
hosting the IEx console. Full docs can be found here.
The Glue Code#
Somewhere in your supervision tree, add the following child:
# filename: lib/application.ex or similar
{Plug.Cowboy,
  scheme: :http,
  plug: Elias.Testing.Endpoint,
  dispatch: dispatch(),
  options: [
    port: 4001,
    dispatch: dispatch()
  ]
}
And of course, here’s that dispatch() function:
def dispatch do
  [
    {:_,
      [
        {"/socket", MyFirmware.ConsoleSocket, []},
        {:_, Plug.Cowboy.Handler, {MyFirmware.Endpoint, []}}
      ]}
  ]
end
After putting it all together you should see: